Contents
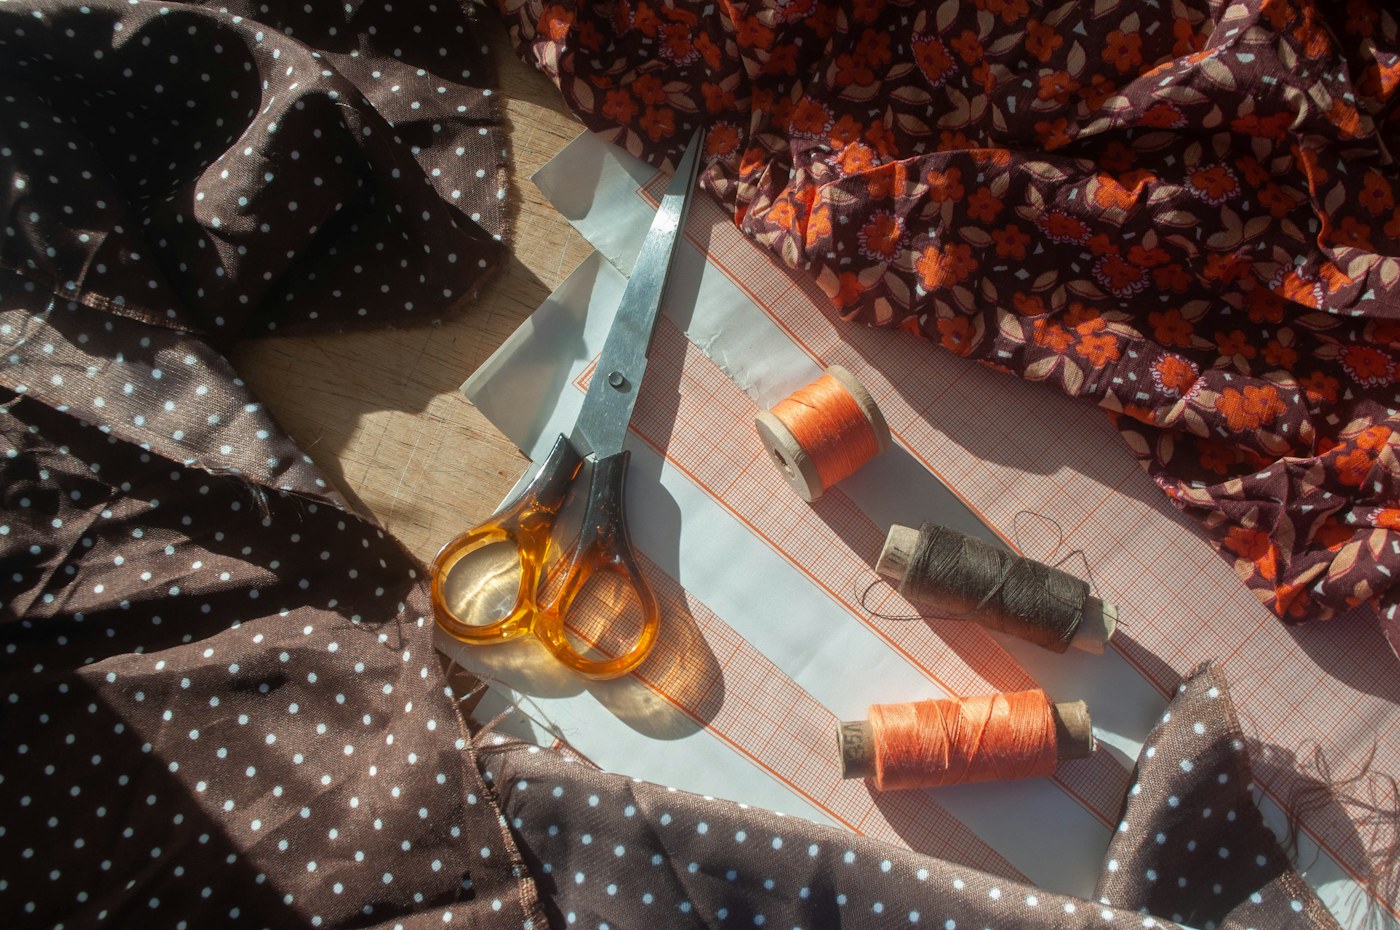
Paper is useful in a repair because it can be wrong cheaply. An outline can be redrawn, turned over, labelled and compared with the garment before any valuable cloth is cut. I like that freedom. It makes the planning visible and separates a question about shape from a question about fabric, instead of forcing both decisions to happen while a pair of scissors is already open.
The example in this article is a hypothetical ordinary woven garment with a local area being assessed for a patch. I have not repaired or tested the garment, and the sample dimensions are arithmetic illustrations rather than recommended coverage. My subject is the paper template: how it records an already suitable patch plan and helps reveal unclear decisions. It does not replace material assessment or the instructions for the eventual stitching and edge treatment.
Give the template a limited, useful job
I would first describe what the patch is intended to address. A localized hole, a wider worn area and an open seam are not interchangeable starting points. If the condition has not been assessed, paper cannot turn it into a suitable patch job. The template becomes useful after there is a plausible plan for the actual material and access. Its role is to preserve that plan in a form that can be examined without making a permanent change.
The Patagonia and iFixit patch guide considers structure, fibre, weight and stretch when selecting material. I would settle those compatibility questions alongside the coverage plan rather than choose a fabric only because the template fits on it. A small piece of cloth can accommodate an outline and still be unsuitable for the garment. Geometry is one part of the repair, not a substitute for the material and care decisions that surround it.
For the hypothetical woven garment, suppose the owner and a suitable guide have established a local patch approach. The next task is to represent its shape clearly. I would make a paper outline that can be held near the area without adhesive or other unnecessary treatment on the garment. It lets the owner compare visibility and access while the patch is still a decision. A template can expose a problem before the actual patch becomes the place where the problem is discovered.
I would keep the first version deliberately simple. Elaborate decoration, a complex shape or a perfectly finished paper edge does not compensate for an unclear repair objective. If the owner cannot explain what the outline covers and why it ends where it does, I would return to that question. The useful paper is the one that makes the decision easier to see, not the one that looks most like a professional pattern from a distance.
Draw three different ideas on separate terms
The damaged area's visible outline is the first idea, but it is not automatically the patch's edge. The condition of surrounding material affects what can support a repair. I would avoid treating a tracing of the hole as a finished patch pattern. A paper outline that merely follows missing material can conceal the more important question of where the chosen repair should meet suitable cloth. That assessment needs to precede the final template.
The second idea is finished coverage: the patch outline the reader intends to see or place after the edge treatment. The third is the cutting outline, which may include cloth required by the selected finish. The linked patch guide demonstrates a particular folded-edge allowance. I would follow a suitable method's requirements rather than turn its example into a universal number for every patch. The template should show which outline is which.
Here is an arithmetic example only. Suppose an already selected plan calls for a rectangular finished patch nine centimetres wide and seven centimetres high, and the chosen hypothetical edge treatment uses one centimetre on each side. A cutting rectangle would then be eleven by nine centimetres. Those numbers demonstrate addition at both edges; they do not prescribe patch coverage or a real method's allowance. The garment and selected instructions determine those decisions.
I would put the words finished outline and cutting outline directly on the paper record. If the cutting shape is kept as a separate template, I would label it accordingly and keep the relationship clear. A later reader should not need to reverse-engineer which rectangle includes the extra cloth. This is particularly useful when a project is paused, because the reasoning can become much less obvious after the garment and the original fitting conversation are no longer on the table.
Label the direction before turning the paper over
A template can fit in more than one orientation while only one corresponds to the plan. I would label the top, the intended visible face and any directional reference the repair needs. If the shape is asymmetrical, I would note which side of the garment it belongs to. These are modest labels, but they reduce the chance that a useful outline becomes a mirrored or rotated instruction when transferred to fabric.
The patch material's structure also belongs in the decision. A template says where an edge lies, but it does not tell the reader that fabric behaves identically in every direction. The iFixit guide's attention to stretch and material compatibility makes orientation worth considering before transfer. I would retain whatever directional information the selected method requires rather than assume the longest template edge should always follow the same cloth direction on every project.
For the hypothetical garment, imagine the planned patch includes a slightly shaped edge to avoid nearby construction. I would mark that side on the template and include a small location sketch. Otherwise the piece can be turned until it looks plausible while the carefully planned relationship is lost. A shape that happens to cover the central mark is not necessarily in its intended position. The labels preserve the reason for the shape as well as the shape itself.
I would also distinguish front and reverse when taking photographs of the template. A picture without an orientation note can make an asymmetrical pattern harder to interpret later. If a replacement paper version is made, I would transfer the labels as carefully as the outline. Copying an edge but omitting the directional information is only a partial copy of the plan. The most important notation may be a small word rather than another measurement.
Measure from references that survive the next step
I would choose reference points that are clear on both the paper and the garment. A nearby seam or another identifiable construction feature may be useful, depending on the job. An undefined point near the damage is harder to recover after the material has been moved. The record should explain where each measurement begins and ends, not just preserve a list of numbers that looked obvious during the first session.
Clover's measuring and marking range separates rulers and gauges from the products that place lines on fabric. I would use that distinction to assign jobs: measure the planned relationship, record it on paper and then select an appropriate fabric marking method for transfer. The tool that makes the darkest line does not verify the measurement. I would compare the paper outline with the recorded dimensions before allowing a fabric mark to become the only version of the plan.
Units deserve their own check. I would write centimetres or inches consistently rather than leave bare figures beside an outline. For an example nine-centimetre width, the paper should say nine centimetres, not simply nine. If another person is helping, consistent units matter more than decorative neatness. A repair template needs to communicate reliably across a pause or handoff, when the person reading it may not share the assumptions of the person who drew it.
I would measure the paper again after cutting it out if the precise outline matters to the plan. A pencil line has width, and cutting casually on either side can change the result. This is an ordinary verification of the template, not a requirement for extreme precision in every visible mend. The appropriate level of accuracy depends on the method. The aim is to avoid an unnoticed discrepancy between the chosen dimensions and the physical piece being used.
Check access as well as appearance
A paper template can show that a proposed patch approaches a pocket, crosses a seam or occupies an area that is awkward to reach. I would compare those relationships before choosing how to hold or stitch the fabric. Covering the visible damage is only part of the job. The reader also needs access to the relevant layers and a suitable method for the construction that actually surrounds them.
In the hypothetical garment, suppose the paper edge reaches a pocket opening. I would stop and ask whether the planned placement interferes with that opening or conceals access needed for the repair. The template has done useful work by revealing the conflict. I would revise the repair plan with appropriate guidance, rather than simply trim a little paper away until the edge looks less awkward while ignoring whether the remaining coverage still makes sense.
I would view the intended reverse as well when access permits. A lining, pocket bag or other layer may sit behind the area, and the template alone cannot make it safe to catch those layers together. The placement check should identify what belongs to the repair and what must remain independent. If that relationship cannot be seen or understood, the next step is an access assessment or professional advice, not a more confident paper outline.
Appearance still matters, particularly for a visible repair, but I would discuss it as a preference. A larger contrasting shape may be welcome to one owner and unwelcome to another. The paper preview can support that conversation without pretending to reproduce the fabric's colour, flexibility or final texture. It is a placement and outline preview. The actual material and stitching will add qualities that a flat sheet of paper cannot demonstrate.
Transfer the information without changing its meaning
Before transfer, I would identify the correct template version and compare its labels with the garment. A revised shape should not sit beside an older one without a clear distinction. I would date or number the versions in ordinary language, then retain the selected one with the work note. That avoids cutting from an attractive earlier version after a later discussion changed its coverage or relationship to the construction.
The fabric marking product should suit the material and its planned removal route. I would read its instructions and test appropriately, rather than assume that every sewing marker disappears by the same method. Marking and patternmaking are separate decisions. A clear paper template does not justify an unsuitable product on the cloth, and a good product cannot correct a template whose cutting and finished lines have been confused.
I would make a final comparison after transfer: same orientation, same dimensions and same line meanings. This pause is especially useful when the fabric's face is not obvious or the pattern is asymmetric. If the outline seems different, I would resolve that now. The paper remains an independent reference while the project is still reversible. Once the cloth is cut, discovering which side of an ambiguous line was intended becomes a much less pleasant exercise.
For the hypothetical rectangle, I would explicitly identify whether the transferred eleven-by-nine outline includes the hypothetical edge allowance. I would not later measure it as though it were the nine-by-seven finished shape. Keeping the words attached to the numbers prevents a simple arithmetic example from becoming a practical mistake. The extra cloth belongs to the selected construction; it should not be counted twice or silently removed because the original plan has been forgotten.
Keep useful templates without turning them into universal answers
A retained template can help explain a completed repair or prepare a similar discussion, but I would label the garment and context it came from. Similar-looking holes do not establish identical surrounding condition, fabric or access. Reusing the paper requires reassessment of the new item. I would keep it as a record of one plan rather than name it a standard patch size that can be applied whenever a damage photograph looks familiar.
The stored record might include the finished shape, the chosen edge treatment and relevant material information. I would remove personal details unnecessary to the repair if the record will be shared. The owner may also retain a small unused material sample when available. None of this needs a large filing system. A labelled envelope can preserve the pieces that would otherwise become an unexplained paper rectangle in the bottom of the sewing kit.
If the repair plan changes during work, I would update the record rather than preserve only the ideal first version. Perhaps access required a different approach, or the owner chose a different visible shape. The useful account is what was actually selected and done, with any remaining questions. A pattern record should not claim a successful outcome or durability result merely because the template looks finished and the paperwork is tidy.
I would discard obsolete duplicates once the relevant history has been kept clearly. Retaining every draft without labels can create more confusion than keeping nothing. The point is to preserve understandable information, not accumulate paper. For a simple one-off repair, a single marked template and concise note may be sufficient. The amount of recordkeeping should match the likelihood that someone will need to understand or revisit the decision later.
Use the rehearsal to find the question still unanswered
The most valuable paper rehearsal may end by showing that the repair is not ready to proceed. The outline might reveal an access conflict, uncertainty about coverage or a mismatch with the owner's appearance preference. I would name that result directly. The template has helped isolate the remaining question, which is more useful than allowing a plausible-looking shape to hide it until the project is partly stitched together.
I would then choose the next source or conversation to answer that question. Material compatibility calls for different guidance from a fitting preference or a lining-access problem. Asking a professional whether a specific proposed placement is workable is easier when the paper shows the intended relationship. The reader can explain the objective without asking the professional to infer it from a loose scrap and a vague wish to cover the area somehow.
For the hypothetical garment, the rehearsal is complete when the selected outline, orientation, construction allowance and access plan can be explained together. That does not prove the future patch's strength or service life. It establishes a coherent plan for the next appropriate method. I think that is an excellent job for paper: reveal decisions early, retain them clearly and allow changes while the expensive material is still untouched.
Frequently Asked Questions
Q: Can I make the patch the same size as the hole?
A: The hole's outline is not automatically a suitable patch boundary. Surrounding condition, the selected repair method and the support available need assessment first. This article deliberately gives no universal overlap measurement. The paper should represent an appropriate coverage plan, with any edge allowance distinguished from the finished shape, rather than merely trace missing material.
Q: Is the numerical rectangle in this article a recommended patch size?
A: No. Nine by seven centimetres finished, with an illustrative one-centimetre allowance on each side, demonstrates how two opposite allowances affect cutting dimensions. It is not a recommendation for coverage or edge treatment. Use the actual garment assessment and instructions for the selected method to determine those choices before making a cutting pattern.
Q: What should I label on a simple template?
A: Record what the outline means, the intended orientation or garment side, units and any relevant finished-versus-cutting distinction. Add the garment or project name if the piece will be retained. An asymmetrical shape especially benefits from face and direction labels. The goal is that someone can interpret the paper after a pause without relying on the original conversation.
Q: Does a paper preview show how the finished patch will feel?
A: Only very incompletely. It can help compare shape, position and access, but it does not reproduce fabric flexibility, texture, colour or the final stitching. Assess material compatibility separately and use an appropriate method. A pleasing paper outline is a planning aid, not proof of comfort, strength, durability or suitability for the garment.
Q: Can I reuse an old paper patch pattern on another item?
A: You can use it as a starting reference, but reassess the new garment's condition, material, care and access. A similar-looking damaged area does not establish the same repair requirements. Keep an old template labelled with its context so its original purpose stays clear. Reuse should preserve useful information rather than bypass a fresh assessment.
One thing to take forward
I like a paper repair template because it makes room for an inexpensive correction. It separates coverage from cutting, preserves orientation and exposes relationships with seams or pockets before the fabric is committed. Its value depends on the plan it records: suitable material, appropriate access and a clear method still have to be established. When those pieces agree, paper becomes a reliable bridge between a repair idea and the cloth that will eventually carry it.
Sources & further reading
Something needs correcting? Write to the editors with the article link.