Contents
The edge of a cuff can make a whole sleeve feel finished or unfinished. When that edge begins to wear, I want to resist the urge to fold the trouble out of sight immediately. A fold changes length and thickness. A patch changes feel. A new band changes fit. Each may be useful, but none is merely a way of erasing the ragged part without affecting anything around it.
Here I compare two hypothetical everyday sweatshirts. One has a short opening in a cuff seam, with the band otherwise intact. The other has a worn lower edge around part of the wrist. I have not repaired or tested either garment. Their purpose is to make the difference between lost stitching and lost material visible, then carry that difference through the choices about ordinary comfort, movement and appearance.
Inspect the band without stretching the damage
I would lay the sleeve on a clear surface and look at the cuff in its relaxed state. The band may be ribbed, a turned fabric edge or another construction entirely. Calling everything at a wrist a cuff does not make its material or method identical. I would follow the actual seam and fold, noticing which piece joins the sleeve and where the damaged region lies within that arrangement.
Next I would view the reverse and the other cuff for context. The intact side can show the original outline or reveal that both bands have similar wear. It is not necessarily a perfect template, because past repairs or asymmetry can matter. I would note any obvious difference without pulling the damaged edge wider. A little patience here can preserve the information needed to decide whether the fault is local or part of a broader pattern.
My first description would remain short: the joining seam has opened, the edge fabric is worn, a loop is pulled, or the construction cannot yet be seen clearly. Those are different tasks. A neat repair starts with the right description, not with a preferred stitch. If loose material obscures the area, I would avoid indiscriminate trimming until I understand whether it belongs to the fabric's structure or is merely a detached thread from stitching that has failed.
Ask what the wrist opening needs to do
The wrist opening has a practical job beyond looking tidy. It needs to allow the hand through, sit as intended and cooperate with the sleeve during ordinary movement. I would consider those uses before deciding that a smaller, firmer band is an improvement. A repair that reduces stretch or adds a hard ridge may change how the garment feels, even if the new stitches look much more regular than the original worn edge.
I would ask the wearer about the current fit before any alteration. Was the sleeve comfortable before the damage appeared? Does the cuff already feel tight or hang too loosely? Those preferences are not technical diagnoses, but they are useful context. The repair should not accidentally solve an appearance concern by creating an unwanted fit change. It is particularly important to separate the wish for a tidier edge from a wish to shorten or reshape the sleeve.
For the first hypothetical sweatshirt, the owner likes the existing length and wrist fit. That gives the seam repair a clear objective: restore the interrupted joining arrangement while preserving the band. For the second, the owner is willing to discuss visible change but still needs the sleeve long enough. That different preference affects which options are worth considering. I would keep those two briefs separate rather than make the same fold on both because they are on the table together.
Distinguish an open seam from a worn edge
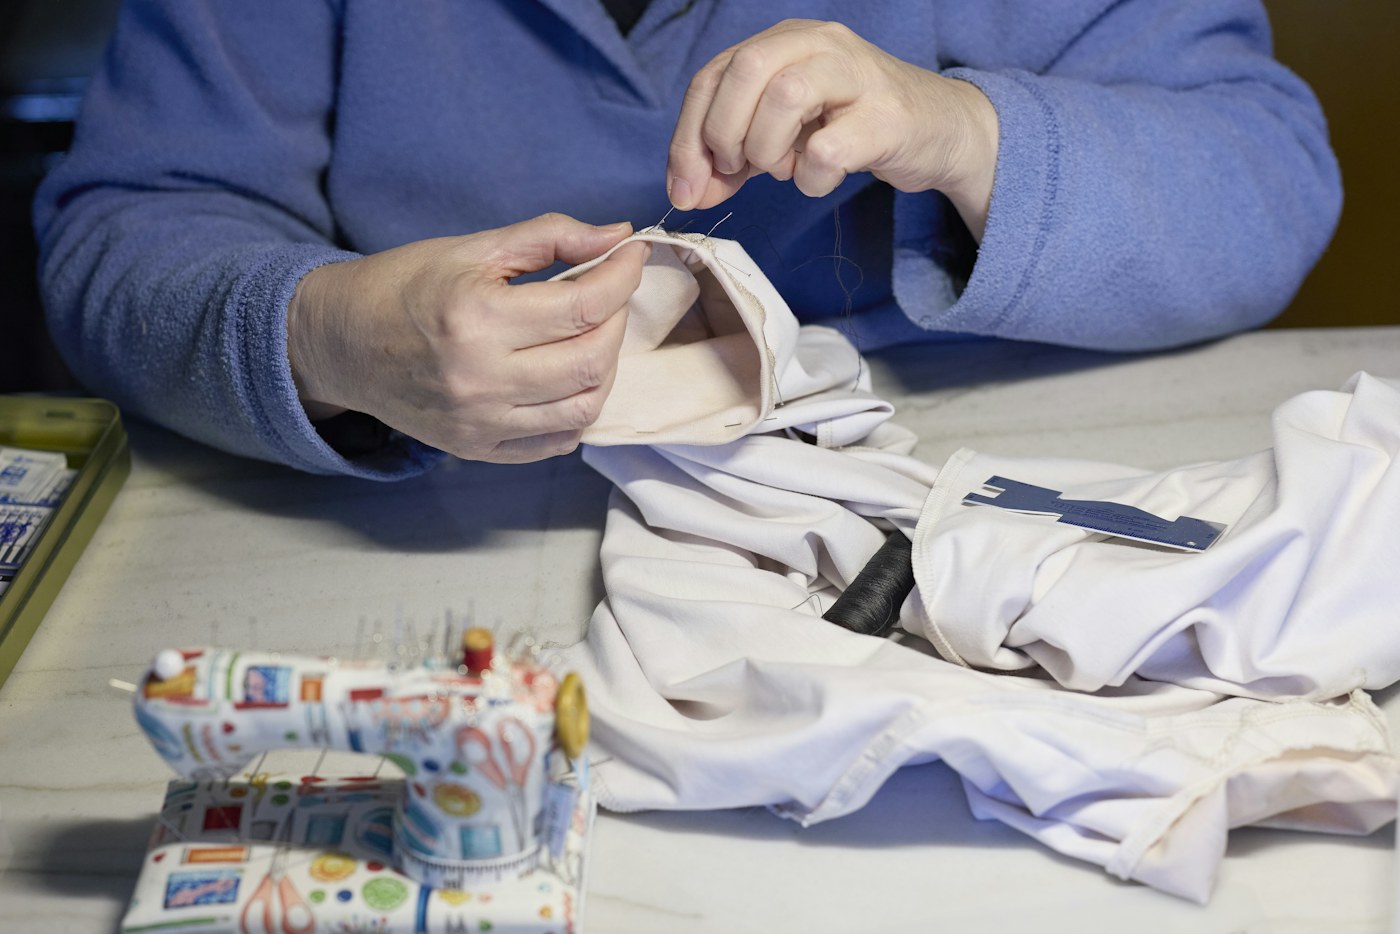
The iFixit hoodie-cuff guide demonstrates an aligned, held repair with a looping hand stitch in its example. The Patagonia herringbone guide addresses a different split-seam context and emphasizes a flexible crossing structure. I would not merge those examples into a claim that every sweatshirt cuff accepts one universal stitch. Their useful shared lesson is to match the method to the actual material, edge relationship and movement needed at the repair.
On the first hypothetical band, I would inspect whether the edges can meet in the original relationship without being drawn together under strain. If the cloth is intact, the task may concern restoring lost joining thread. If material has worn away, a seam-closing instruction may pull the band into a new shape. The difference can be subtle in a photograph, which is why the condition of the edges matters more than how narrow the opening initially appears.
On the second band, wear is distributed along the lower edge rather than confined to a short seam gap. Adding stitches across that edge may not address the missing material. I would compare a local intervention with a larger band repair or replacement. The comparison should include the length and feel left afterward. A tidy new edge is not automatically a suitable outcome if it consumes the part of the cuff the wearer depended on for fit.
Compare the three changes that are easy to overlook
The first change is length. Turning material inward or removing a worn strip can shorten the effective sleeve. I would look at the cuff and sleeve together, rather than measure the damaged band as an isolated ring. The same amount of folded cloth can be insignificant on one garment and noticeable on another whose sleeve is already short. A proposed alteration needs to be evaluated on the intended wearer, with all temporary tools safely removed before ordinary movement.
The second change is bulk. A patch, extra fold or heavy thread can create a thicker region against the wrist or near the join. I would ask where that thickness will sit and whether the chosen construction distributes it sensibly. A solution suitable for an occasional loose outer layer may feel quite different on a frequently worn close-fitting sweatshirt. The aim is a reasoned material choice, not simply the heaviest possible reinforcement.
The third change is movement. A stiff addition or over-tight stitch can affect how the opening expands. I would not use a rigid paper ring as proof of the final fabric fit, nor infer a strength rating from a stretchy-looking stitch pattern. The actual band, material and method need to work together. Naming these three changes gives the owner something concrete to compare before an irreversible cut turns a possible repair into a fixed alteration.
Work through the short seam opening
For the first example, I would preserve the band's relaxed shape and inspect the join at both ends of the opening. The plan is to restore the interrupted construction, not narrow the cuff. I would choose the illustrated method whose material and edge arrangement actually match, then prepare a small representative sample if the movement is unfamiliar. Practice is useful here because it makes the stitch direction visible without committing the garment to an uncertain first attempt.
Holding the intended layers is part of the work. A sleeve can fold against itself, and a cuff's interior can be difficult to see while stitching. I would arrange access so that the opposite wall remains free and the reverse can be inspected. The correct stitch is not enough if it joins the wrong layers. If the setup cannot be controlled comfortably, I would change it or ask for help rather than treat awkward access as a reason to work by feel alone.
After the selected method is finished appropriately, I would inspect the join in its relaxed state and during gentle ordinary movement. The appearance should be compared with the intended construction, not an imaginary requirement that every hand repair disappear. If the opening has become tight or distorted, I would revisit the method and tension before adding more thread. The hypothetical exercise ends with observable questions, not a claim that a particular stitch has been tested successfully on these garments.
Plan the worn edge as a larger decision
The second cuff needs a broader view. I would identify how far the weak area extends and whether the rest of the band remains suitable. A small decorative patch may make sense for localized wear; a heavily deteriorated band may ask for replacement or another assessment. I would not let the sentimental value of the sweatshirt make every remaining scrap of the cuff an untouchable requirement. Preserving the garment can sometimes involve changing a component deliberately.
A replacement discussion should address the actual opening, join and desired finished length. The old band is useful evidence, but a worn or stretched piece may not supply an unquestionable pattern. I would ask a repairer how they would establish the replacement rather than hand over a measurement stripped of its context. Compatible appearance and behavior both matter. A close color match does not by itself establish that a new band has the right feel or movement.
The owner should understand the visible result before authorizing work. A contrasting cuff can look intentional; a near match can be acceptable; preserving a particular detail can matter more than uniformity. These are preferences to discuss, not outcomes I can promise from a remote description. A useful proposal explains what will change and what the change is intended to achieve. It should leave room for the owner to decide whether that new version of the sweatshirt still suits them.
Make a temporary comparison that answers one question
I would use a paper outline or a safely arranged sample to visualize proposed length and the location of a fold. That can help compare options before cutting. It cannot reproduce the stretch, drape or feel of the final construction. The comparison needs a specific purpose, such as seeing how much visible cuff remains or where an extra layer would sit. A mock-up becomes misleading if it is asked to certify properties that paper and a few pins cannot establish.
For the hypothetical worn band, I might draw the current edge, the proposed finished edge and the remaining join. Keeping those lines distinct stops a cutting line from quietly becoming the finished-length line. I would record the assumption beside the sketch. If the chosen method needs additional material for a fold or join, that belongs in the construction plan rather than being subtracted casually from the wearer's preferred length at the last moment.
I would then compare the proposed change with the garment's ordinary role. Does the owner push the sleeves upward? Is the sweatshirt worn beneath another layer? Those details can explain why extra bulk or lost length matters, without suggesting a universal cuff design. The useful decision may be a different method, a service inquiry or leaving the current design intact until suitable work is possible. A temporary comparison earns its place by making one choice clearer before the garment is altered.
Inspect comfort without calling it a test result
Once appropriate work is complete and all temporary tools are removed, I would inspect the cuff with the garment relaxed, then consider ordinary wearing. Does the opening allow the expected movement? Has the sleeve length changed as agreed? Is there a rough or bulky region where the wearer did not expect one? These questions concern the actual result. They do not establish long-term durability, material strength or any broader certification of the garment.
If the answer raises a concern, I would describe where and when it appears. A band that feels tight only when passing over the hand suggests a different question from a rough inner seam or an uneven-looking edge. A precise description makes correction easier to discuss. I would avoid cutting a second time simply because the first result feels unfamiliar. The next action should follow the identified issue, especially when additional shortening would reduce options further.
Care remains part of the result too. Any new material or service advice relevant to the garment should be retained alongside its existing instructions. I would not assume a repaired cuff authorizes a different washing process or that a compatible-looking band behaves identically to the old one. A short factual note can identify what changed, while the actual garment and its guidance remain the basis for later care. The aim is ordinary useful wear, not the appearance of a flawless new product.
Keep the next inspection proportionate
I would revisit the cuff when ordinary use reveals a reason: a new opening, a recurring snag or a change in fit. I would not turn every wearing into a close examination of individual stitches. The first inspection should have made the main choices understandable enough that the owner can recognize a meaningful change. That is more useful than leaving a vague instruction to keep an eye on it with no indication of what matters.
The repair record can stay simple. If only a short seam was restored, a brief note about the method may suffice. If a band was replaced or length altered, the material and agreed change deserve a little more context. Those details can help a future repairer interpret the garment. They do not need to become a claim about how long the work will last or a history of every ordinary washing and wearing since it was done.
What I like about the two-cuff comparison is that it resists a convenient but shallow conclusion. Both garments have trouble at the wrist; only one is primarily a short seam task. The other asks a design and material question. Keeping that distinction visible allows a repair to respect the sleeve's length, the opening's movement and the owner's preferences. A small edge can change a larger part of the garment, so I want that change to be intentional.
Frequently Asked Questions
Q: Can I fold a worn cuff edge inside and sew over it?
A: That may suit some constructions, but consider lost length, extra bulk and movement first. A fold is an alteration as well as a way to conceal wear. It does not restore missing material or automatically make the remaining cloth suitable support.
Q: Is a seam opening the same as a hole in the band?
A: No. A seam may have lost joining thread while its edges remain intact. A hole or worn region can involve missing or weakened material. Identify which condition is present before choosing a method intended for one of them.
Q: Should replacement cuffs match exactly?
A: Appearance is a preference to discuss alongside material compatibility and fit. A deliberate contrast can be acceptable, while some owners want a close match. Neither preference removes the need to assess the opening, join and resulting sleeve length.
Q: Can a paper mock-up establish how stretchy the result will be?
A: No. It can help visualize shape or length but cannot reproduce the final fabric's behavior. Use it for a defined planning question, then select an appropriate material and construction for the actual garment rather than treating the outline as a performance test.
Q: When is a repairer the better next step?
A: Consider item-specific help when wear extends around the band, supporting cloth is uncertain, replacement requires unfamiliar construction or the required finish exceeds a beginner method. Bring the owner's fit and appearance priorities as well as the visible fault.
One thing to take forward
I would give a worn cuff a little more thought than its size seems to demand. The edge participates in the length, movement and feel of the whole sleeve. By separating a local seam opening from material wear, I can choose a plan that preserves what works and makes any larger change knowingly. A tidy wrist edge is useful when the garment remains comfortable to wear.
Sources & further reading
- How To Repair a Torn Hoodie Cuff — iFixit ↗
- Herringbone Stitch on a Split Seam — Patagonia / iFixit ↗
Something needs correcting? Write to the editors with the article link.